A guide to laser cutting and fabricating a simple Perspex sign
Published on: 22/11/2022
Perspex is an ideal material for manufacturing signs – it’s lightweight, highly weather resistant (Perspex is guaranteed for 10 years against discolouration), available in 150+ colours, easy to bond together and machine with saws, lasers and routers and various other machinery.
A type of sign that everyone will have no doubt seen many times in public places such as shopping centres, museums, offices and even on house fronts are standoff signs, such as the ones shown below.
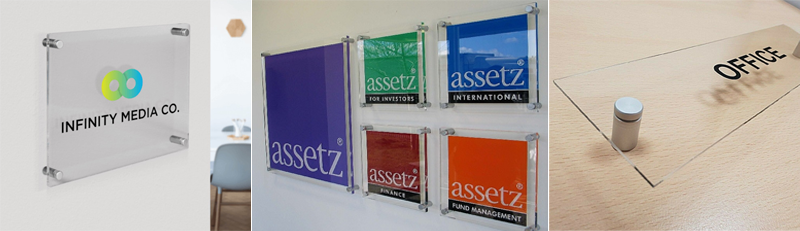
This type of sign is ideal for a multitude of locations because they are low cost, lightweight, easy to mount and depending on how they are fabricated, can even be re-used by removing and updating the decals.
In this article we’re going to walk through the steps involved with fabricating a standoff sign for the Simply Plastics logo using a CO2 laser. At Simply Plastics we’ve built up quite an arsenal of laser cutting machines, including a 60w laser engraver, 100w and 200w machines with a working area of 1250mm x 900mm and a 400w large format laser with a working area of 3050mm x 2050mm. Our machines are from two leading brands, Trotec and Lotus Laser Systems.
For the purposes of this article we’re going to assume that you have the artwork ready, therefore we’re not going to cover how to create a logo in Adobe Illustrator or any other graphics software. We’ll also assume that you know the Perspex colours you need – the Simply Plastics logo can be most closely matched to the following Perspex colours:
![]()
Step 1 – Cutting the backplate
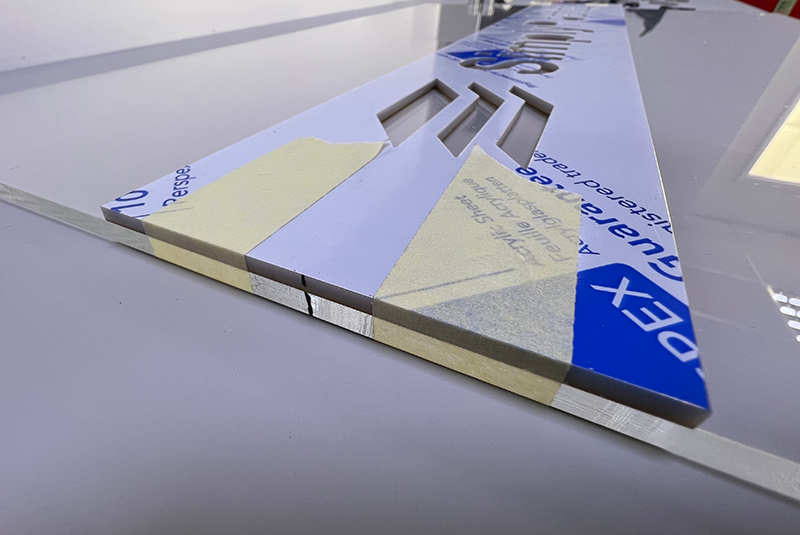
The first step is to cut the Clear Perspex backplate (we’re using 5mm thick Clear Cast Perspex however you can also use Extruded) to the correct dimensions with a hole in each corner for the chrome standoffs. For this example, we‘re going to fabricate a sign that is a standard picture size, 24” x 16”, and use Satin Aluminium standoffs with a 19mm diameter and a projection of 25mm. These standoffs require a 10mm diameter clearance hole.
A simple CAD drawing of our clear Perspex backplate is shown below:
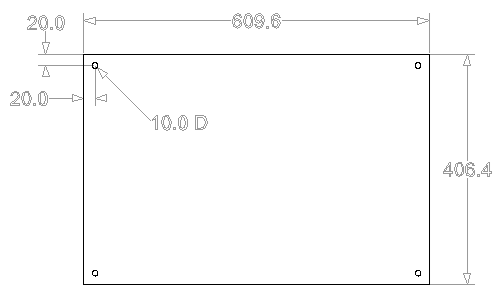
Note: Although we are making a 24” x 16” sign, we always work in millimetres and therefore the dimensions on the drawing are all in mm.
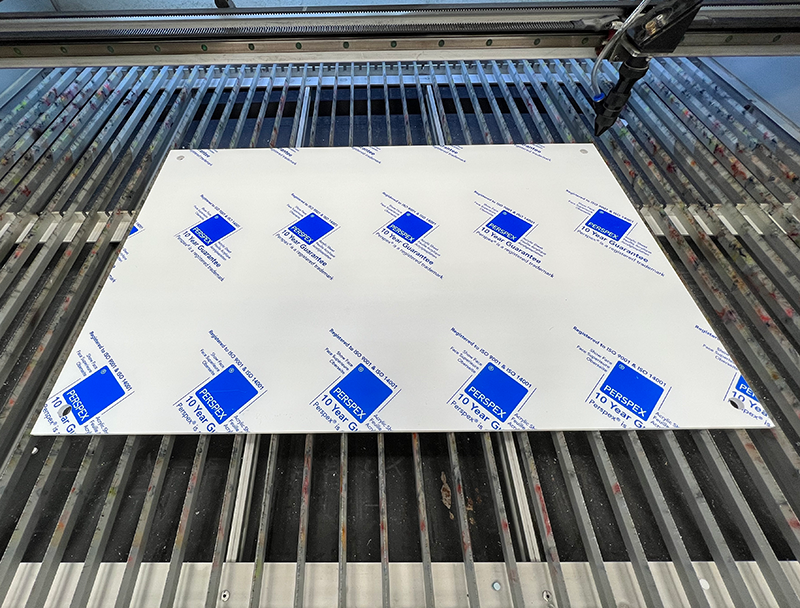
We can now cut the backplate from our Perspex panel – ensure that you cut the panel at least 5mm larger in each direction to ensure that you leave enough space for the backplate to be laser cut whilst minimising waste.
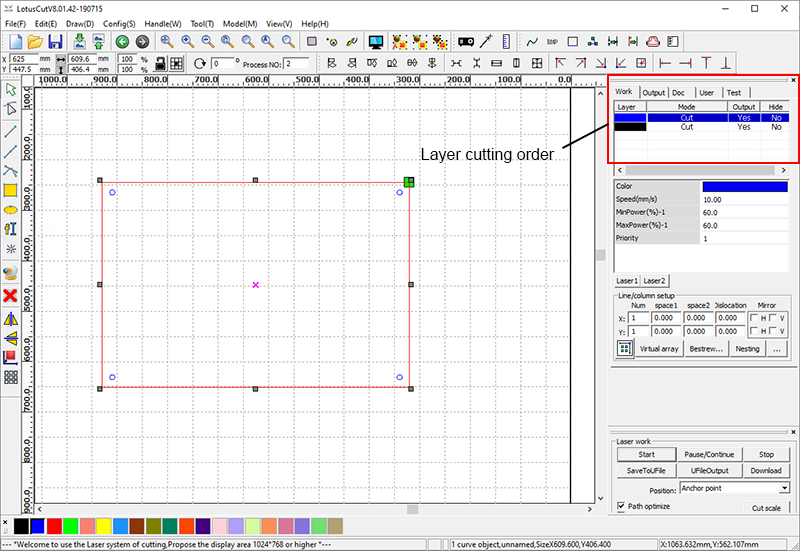
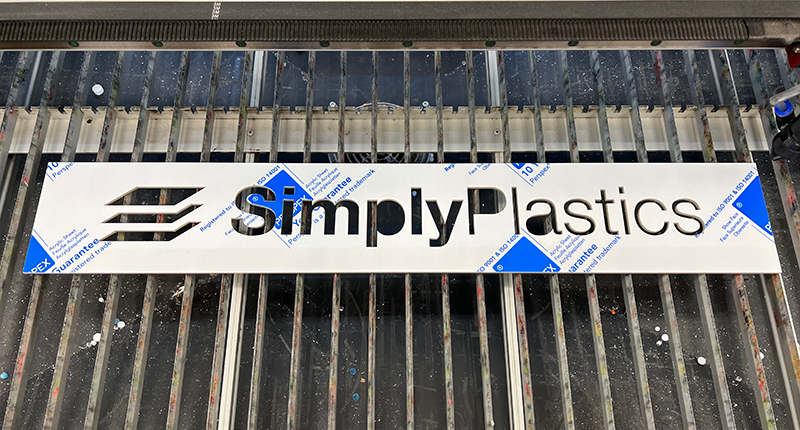
The laser we will be using for this example is a 100w machine. To ensure the finish on the edge of the acrylic has a nice smooth finish we’ll be cutting at a power rating of 60% and a speed of 10mm per second. Via the software we’ll specify the order in which we want the layers to be cut, in the drawing above we’ll cut the holes first followed by the outline of the backplate. It is generally best practice to cut internal lines first – it helps to ensure internal parts remain firmly attached to the actual cut and prevent them from moving/slipping.
Once cut we have our backplate as shown below.
Step 2 – Cutting the logo
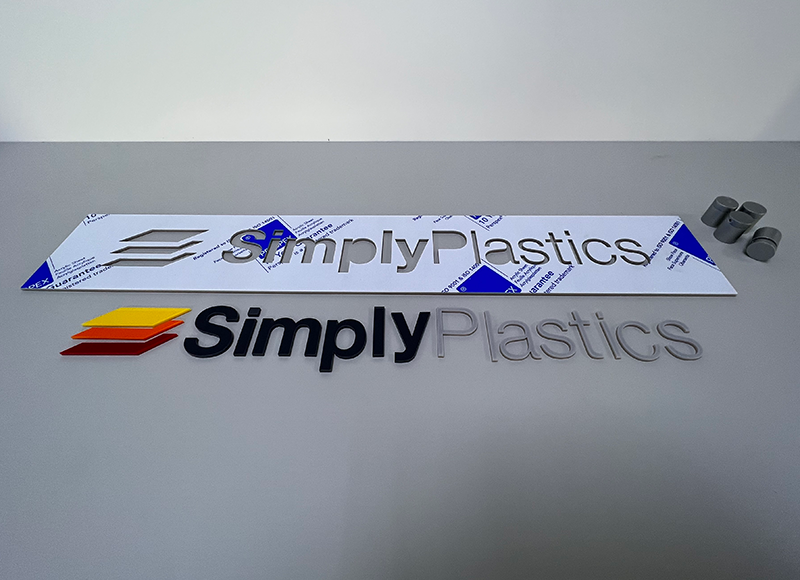
To cut the logo we need five colours of Perspex:
- Yellow 260, Orange 363 and Red 4415 for the 3 parts of the logo depicting cut Perspex sheets;
- Grey 9640 for the word “Simply”
- Grey 9981 for the word “Plastics”
To ensure we can align our logo centrally on the backplate both vertically and horizontally we’re going to start by cutting the entire logo from a single piece of Grey 9981, which measures 609.6mm wide (the same width as our backplate) and 100mm in height. By cutting the entire logo from a single piece of Perspex we’ll be left with a template which we can temporarily attach to the backplate then use to position our logo. Before cutting any of the pieces that make up the logo we will cover the back in a strong double sided tape which is not only suitable for laser cutting i.e. it doesn’t produce any dangerous fumes when cut, but is also weatherproof and semi-permanent.
Once we’ve cut all of the other letters and shapes we require for the logo we’ll have everything we need to build the sign.
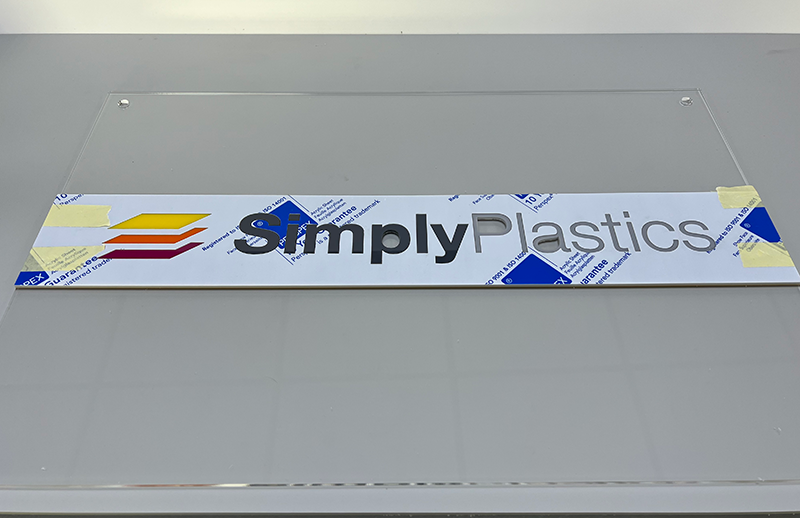
Step 3 – Aligning the logo
There are several techniques that can be used to ensure that your logo or lettering is aligned correctly – the technique you choose comes down to cost/budget, time, and the complexity of the logo being cut. As described in the previous step, we initially cut the entire logo from a single piece of Grey 9981 Perspex measuring the same width as the backplate and 100mm in height. Because this template is the same width as the backplate it becomes very easily to align the logo horizontally by simply aligning the edges of the template with the backplate. To align the logo vertically, simply use a measure to mark the vertical centre point of both panels and align these. Once the template is positioned correctly, we’ll simply use some masking tape to hold the two panels together whilst we position the logo.
Note: When we fabricate larger signs we’ll often cut an identical template from 2mm White Foamex. This is because Foamex is one of the cheapest materials available and is incredibly lightweight, and can therefore be temporarily adhered to the sign for the purpose of positioning the logo/lettering/decals. It’s important to note that Foamex cannot be laser cut and therefore if you cut it on a router, the router will cut radiused internal corners (because routers use round cutting tools like an endmill) which will prevent the square corners of your logo/lettering from fitting in the template. It’s very easy to get around this problem by altering your toolpath to include undercuts on the internal square corners.
Step 4 – Adhering the logo
Now that the template has been temporarily adhered to the backplate we can simply peel the protective layer on the double-sided tape off each part of the logo and position them on the backplate, using the template as a guide. It’s advisable to apply some pressure to each of the parts to ensure that there is a tight bond between the tape and the Perspex.
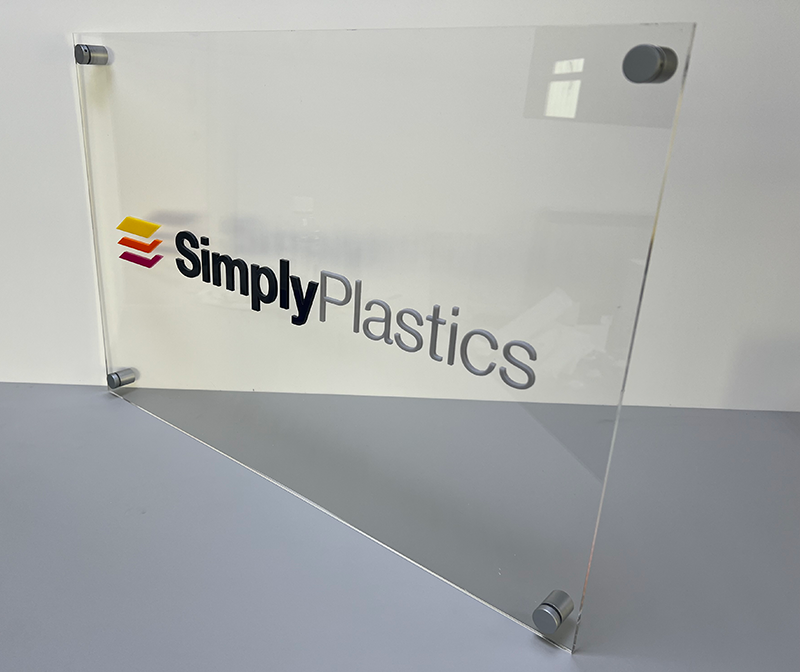
Step 5 – The finished product
After 30 minutes the tape will have created a very strong bond and therefore the template can now be removed. Simply peel off the masking tape and very gently separate the template from the backing plate. Once removed, simply connect the standoffs to the backing plate!
We hope this simple guide provided useful information on how to laser cut a low cost but visually impressive sign from Perspex.
At Simply Plastics we have over 10 years of experience of laser cutting Perspex, from one-off prototypes of large batch runs of thousands of parts. If you need any help on your next laser cutting project please contact us.
 {{product.colours}} Colours